Introduction – Cost vs ROI for Small Businesses
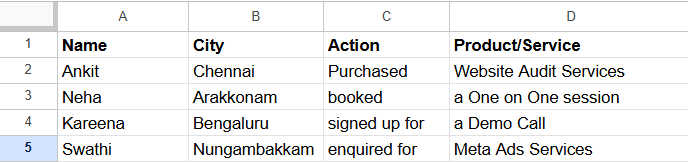
Every small business owner faces the same question: Is this tool worth the cost? When it comes to social proof popup plugin pricing, the answer depends on return on investment. These tools act as social proof apps to increase sales by showing real-time notifications—like “20 people just bought this product” or “Sarah from New York just signed up”—to build trust and urgency.
Even a single extra sale a week can often cover the subscription cost, which makes pricing less about expense and more about opportunity. That’s why so many entrepreneurs now consider them free social proof apps for startups, small businesses, and eCommerce stores.
Pricing Overview – Free vs Premium Tiers
Most social proof apps for small businesses use a tiered model with free and premium plans. Free tiers let you test how social proof to increase leads works on your site, usually with limited popups or branding. Premium plans remove restrictions and add advanced features like analytics, targeting, and integrations.
This makes social proof tools flexible enough for startups, Shopify owners, and bloggers. Whether you need a free social proof plugin WordPress or are comparing top social proof apps 2025, there’s an option to fit your budget.
Included Features (Free) – Real-Time Popups, Basic Customization, Responsive Design
Even without spending money, most social proof apps with real-time data provide core features that deliver immediate impact:
- Real-time popups: Showcase sign-ups, purchases, and activity instantly to build credibility.
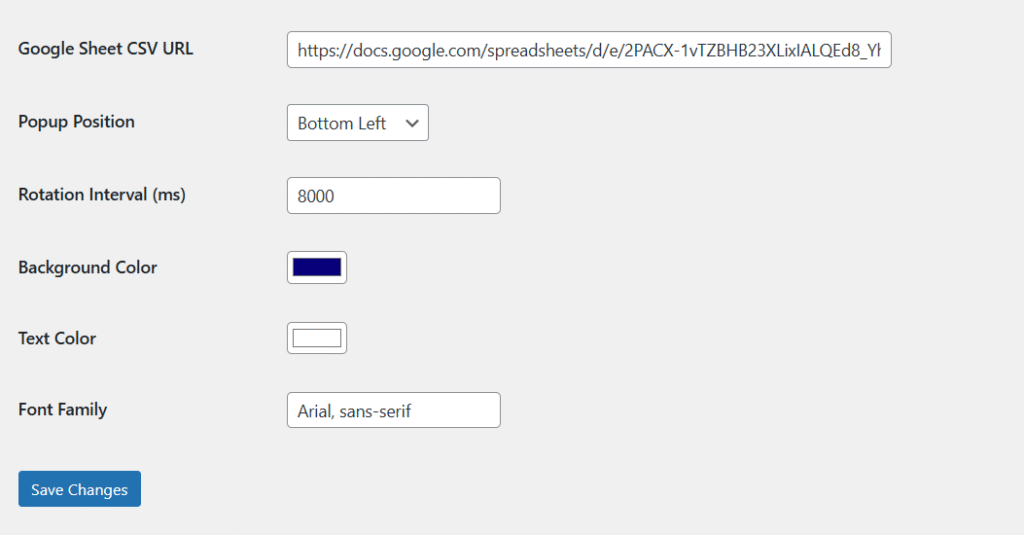
- Basic customization: Adjust colors, text, and position to match your site branding.
- Responsive design: Popups adapt seamlessly for desktop and mobile visitors.
These essentials help businesses test the benefits of social proof and decide whether upgrading makes sense.res are often enough for small businesses to test whether social proof boosts engagement before committing to a paid plan.
Premium Comparison – Which Option Fits Your Business?
Here’s how some of the most popular social proof popup plugin Here’s how some of the most popular social proof apps for Shopify stores, WordPress, and SaaS compare:
- TrustPulse ($9/month) – A budget-friendly option with real-time notifications, action tracking, and targeting. Frequently featured in social proof apps reviews and ratings, making it great for startups.
- ProveSource (starts at $21/month) – Pricier, but worth it for businesses needing broad integrations with Shopify, WordPress, and Zapier. Considered one of the best social proof plugin WordPress options due to its customization depth.
- Nudgify (from $9/month) – Goes beyond proof with nudges like scarcity messages (“Only 2 left in stock”). Popular with eCommerce, especially when used with social proof on website examples for eCommerce.
Comparing these best ways to show social proof helps businesses prioritize between affordability, features, and scalability.
ROI Analysis – More Trust → Higher Conversions → Plugin Pays for Itself
The biggest reason social proof popup plugin pricing is justified comes down to ROI. Social proof creates instant credibility. Visitors see others buying, subscribing, or donating, and they feel more confident to act.
For example, if a $9/month plugin helps you close just one $50 sale, it already pays for itself. With steady site traffic, these tools can deliver dozens of extra sales or leads monthly. That’s the power of the best social proof software WordPress can integrate.
Recommendation – Start Free, Upgrade for Advanced Targeting & Analytics
If you’re uncertain about cost, the smartest strategy is to start with a free social proof plugin WordPress. Once you see results, upgrade for features like:
- Advanced targeting – Deliver tailored popups to the right audience.
- Analytics – Track engagement and conversions for accurate ROI.
- Custom branding – Keep your proof messages aligned with your website style.
This way, you invest only when you’re confident that social proof apps for small businesses are working for you.
Conclusion
The flexibility of social proof popup plugin pricing makes it accessible for every stage of business. Start with free, measure engagement, then scale with paid tiers. Whether you pick TrustPulse, ProveSource, or Nudgify, each is among the top social proof apps 2025 designed to build trust and drive conversions.
Try a social proof popup plugin today—let trust do the selling for you.
 ProveSource